A protractor is one of those tools you almost never own unless you're a student or a drafter, which means it's rarely around when you actually need it — checking a miter saw cut, verifying a folded paper angle, or confirming a slope on a drawing. Here's how to measure an angle without one.
Method 1: Estimate with Known Reference Angles
A right angle (90°) is easy to reference against the corner of a piece of paper or a book. A straight line is 180°. You can estimate other angles by comparing them proportionally against these references — useful for a rough check, but not precise enough for anything that needs to be exact.
Method 2: Trigonometry from Measurements
If you can measure the two legs of a right triangle, you can calculate the angle using basic trigonometry: the arctangent of the opposite side divided by the adjacent side gives you the angle in degrees. This works but requires careful measurement of both sides and a calculator — more steps than most people want for a quick check.
Method 3: A Free Online Protractor (Fastest and Most Direct)
The most direct substitute for a physical protractor is a digital one that overlays a full 360° graduated circle on your screen. RulerGo includes exactly this, sharing the same calibrated scale as its ruler and caliper.
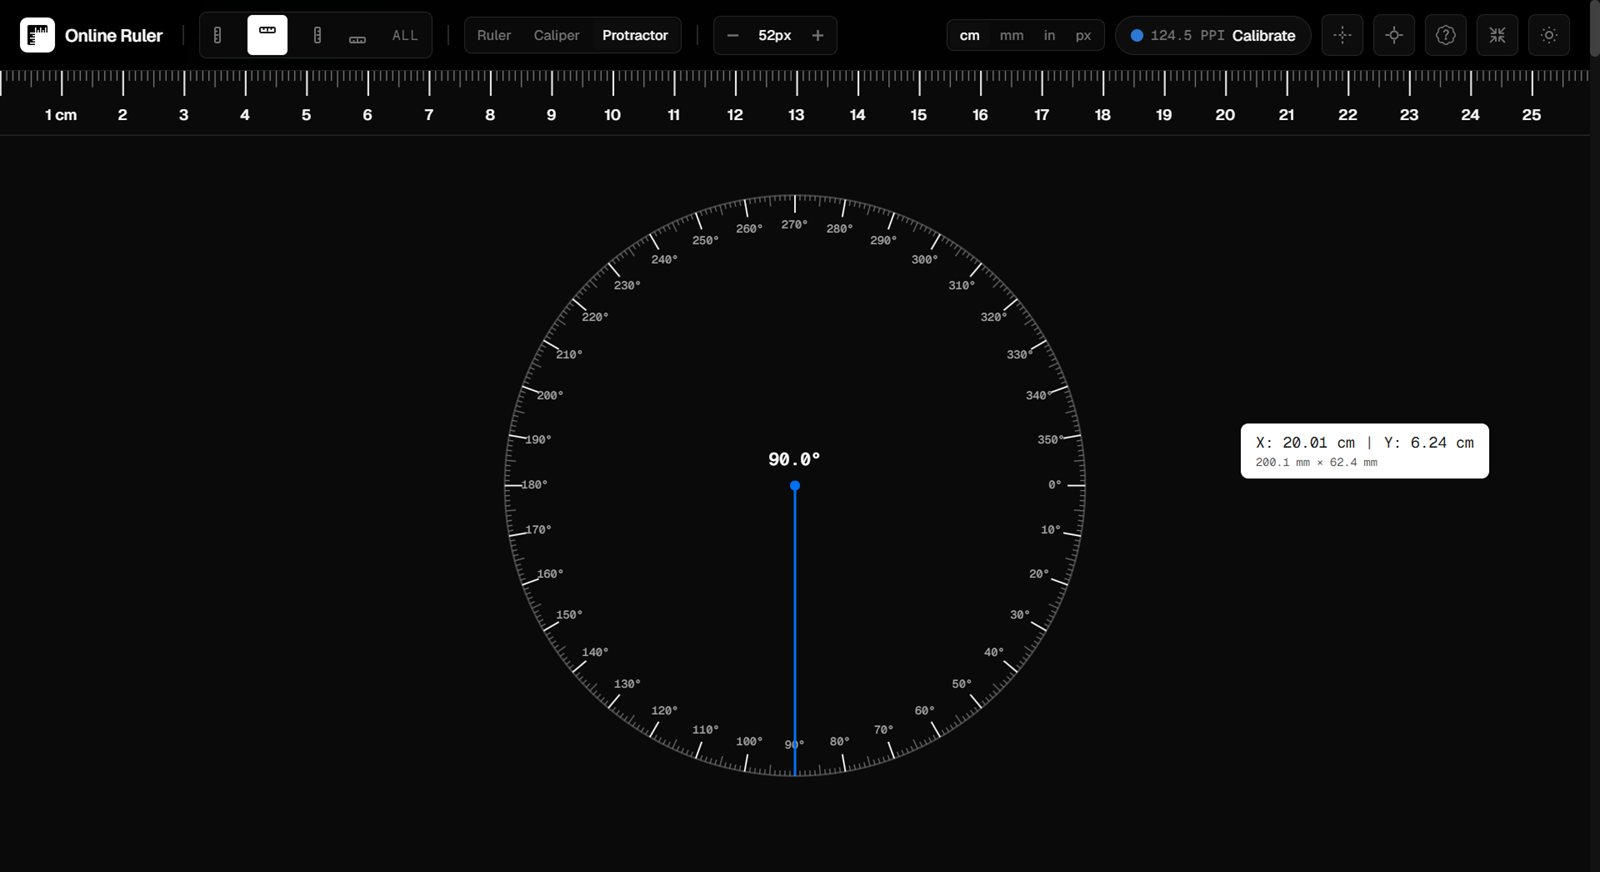
Step-by-Step: Measuring an Angle Online
- Open the online protractor tool.
- Press P, or select Protractor from the toolbar. A semi-transparent 360° circular overlay with radial graduations appears.
- Drag the center bullseye handle to align exactly with the vertex — the corner point where the two lines of your angle meet.
- Align one edge of your angle with the horizontal 0° baseline on the overlay.
- Read the angle where the second edge crosses the outer degree ring, or drag the rotating indicator arm to match it for a precise readout.
- Press P again to return to ruler mode.
The tool measures with 0.1° resolution, which is considerably finer than most printed protractors allow you to read reliably by eye.
Common Situations Where This Comes Up
- Miter saw cuts — checking whether a cut angle on a piece of trim or molding matches your target before committing to the cut.
- Folded paper and origami — verifying fold angles match a pattern.
- Architectural drawings — checking roof pitch, slope angles, or elevation drawings against a scanned or photographed plan.
- Mechanical drafting — verifying angles on a CAD export or technical sketch pulled up on screen.
- Geometry homework — a fast way to check hand-drawn angle answers.
Tips for Accurate On-Screen Angle Measurement
- Zoom or use fullscreen mode so the protractor overlay is as large as possible relative to your angle — more graduation space means less reading error.
- Align the vertex first, then the baseline. Getting the center point exactly on the vertex matters more for accuracy than fine-tuning the baseline afterward.
- Photograph flat, straight-on if you're measuring an angle from a physical object rather than something already on screen — an angled photo will distort the true angle.
FAQ
Can an online protractor measure reflex angles above 180°?
Yes — a full 360° protractor like RulerGo's covers the entire circle, not just the 0–180° range of a typical physical half-protractor.
How accurate is a digital protractor compared to a physical one?
A digital protractor with fine graduations (0.1° in RulerGo's case) is generally more precise to read than a physical protractor, where reading between the printed degree marks by eye introduces more error.
Do I need to calibrate my screen to measure angles?
Angle measurement itself doesn't depend on physical scale calibration the way length does, since degrees are a ratio, not a physical unit. However, calibrating first ensures the vertex and baseline you're aligning to are positioned exactly where you expect on screen.
Can I use this on a photo of an angle, not just a physical object?
Yes — align the protractor overlay against an angle displayed in a photo or drawing on your screen the same way you would against a physical object held up to the screen.